General

3 Meter Extensions: A Guide On Design, Cost & Planning

3 Meter House Extension: Design, Cost & Planning Guide

Curious about adding a 3 meter extension to your property? This comprehensive guide will walk you through everything you need to know, plus exploring its numerous benefits. You will learn about the popular types of extensions, and discover some important considerations for planning your project, including navigating planning permission, building regulations, and budgeting for extension costs. Our guide covers essential design tips, construction methods, material selection, to ensure your extension blends seamlessly with your existing home (This is important!) If your families growing and your looking to add more bedrooms, improve functionality, or simply create extra living space, this article provides valuable insights and expert advice to help you make informed decisions and successfully complete your extension project.
 

3 meter extension

Why build a House Extension thats 3 meters?

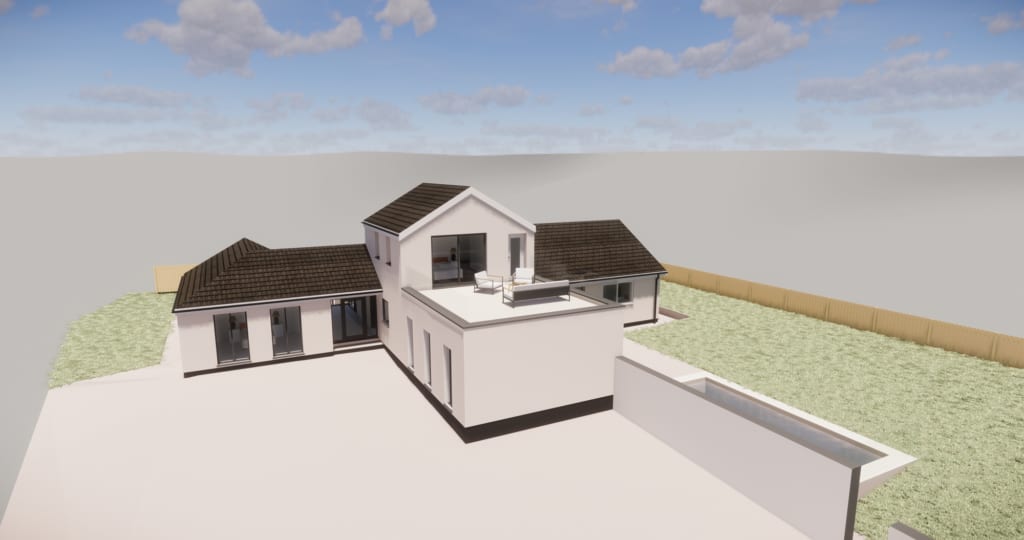
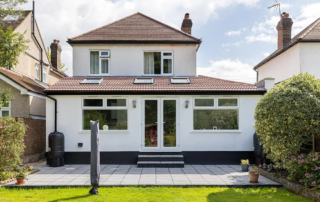
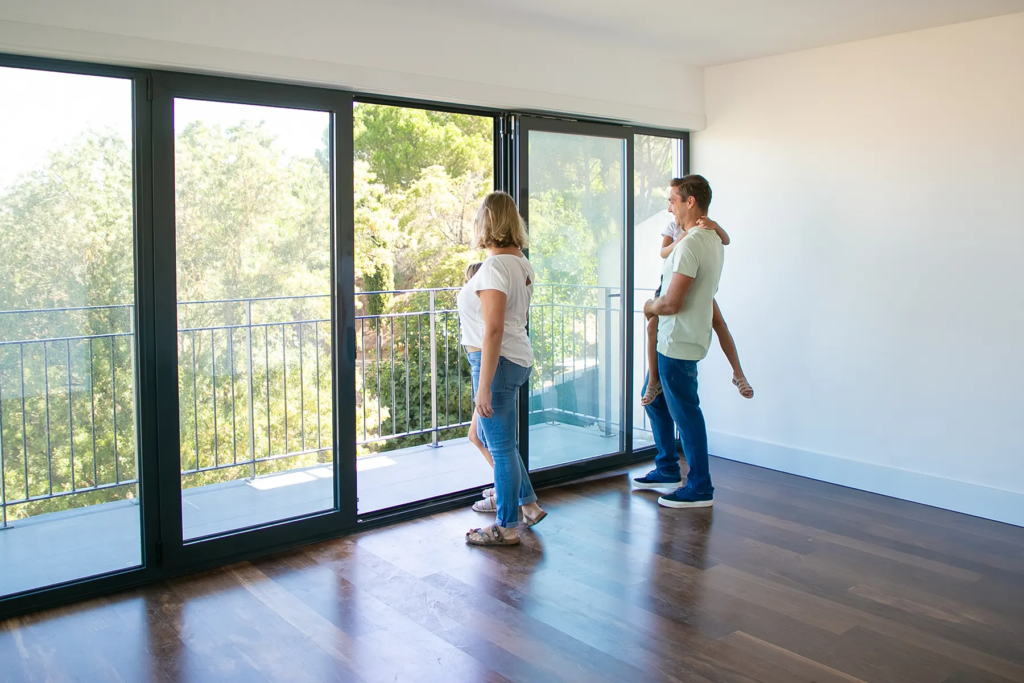
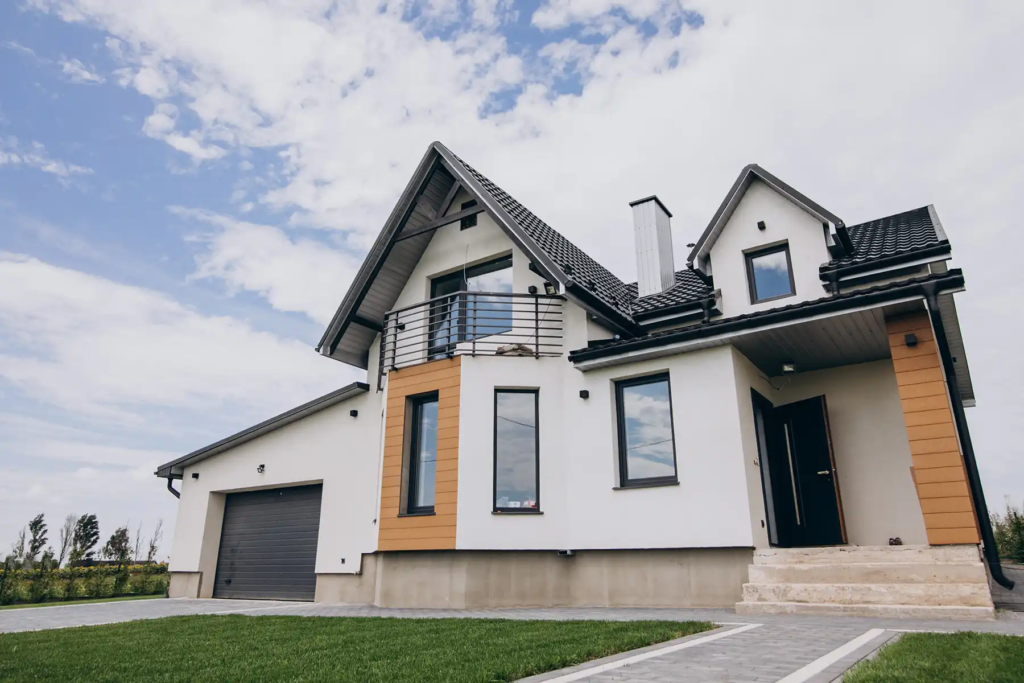
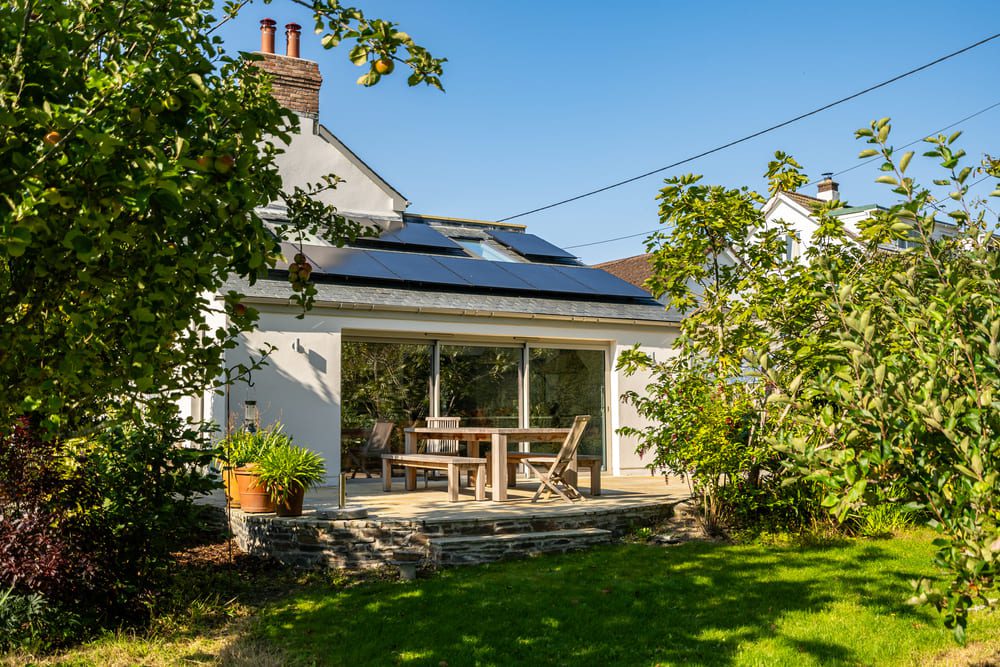
A 3 meter house extension is the ideal size for making smaller properties feel much bigger, perfect for an open plan kitchen or play rooms for the kids! This type of home improvement is often used for extending the building to its rear or side. These extensions are particularly popular among homeowners looking to enhance their property’s value while gaining additional, functional living areas, without compromising too much ground space.

Extending a single storey or going for a two storey extension can really change how you use your home, making it more suitable for your needs. Well-planned single or double storey extensions can dramatically improve the flow and overall aesthetic of your house, providing you with the room you need to live more comfortably.

This type of extension offers numerous benefits, starting with the most obvious one: extra space! This additional space can help to create a new bedroom, expanding your kitchen, or adding an open plan living area for entertaining. The beauty of an extension lies in its flexibility, you can design it entirely around your needs, creating a space that’s perfectly tailored to you and your family.

Beyond the immediate convenience, a well-executed extension can certainly boost your property value and provide you with some extra equity. A 3 meter extension can increase your home’s value by anywhere from 5% to 23%, especially if it includes functional spaces like an extra bedroom. Check minimum size for bedrooms here.
building regulations

Popular Types of Home Extensions

When it comes to extending your property, you have several options to choose from, depending on your current layout and plot size. Let’s dive into the details of these most common types of extension and see how they can transform your home.

Kitchen Extensions: Heart of the Home

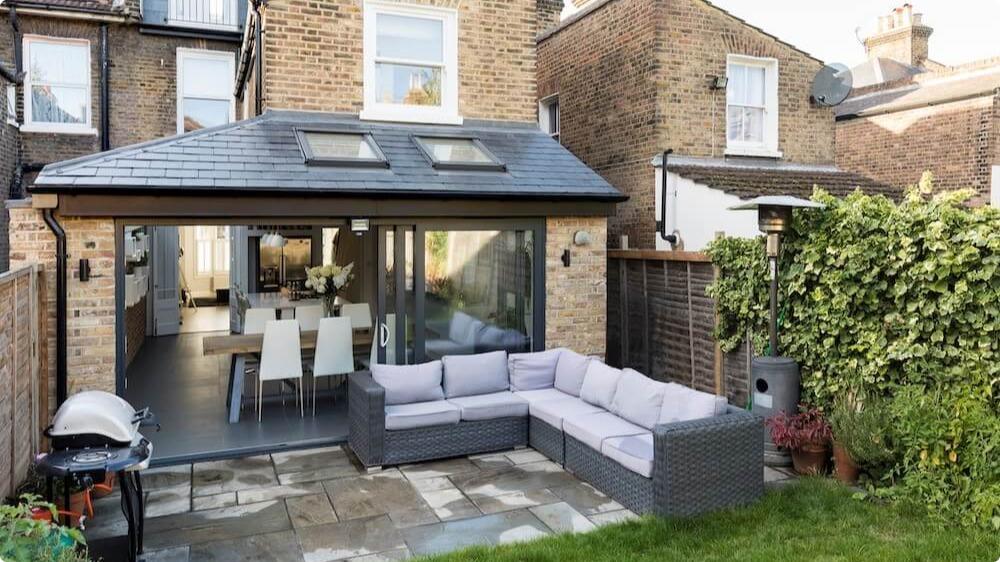
We know that kitchen extensions are highly popular as the kitchen is often the heart of the home. A ground floor rear extension, creates a spacious, open-plan kitchen connected seamlessly to the rear wall, a popular options for terraced houses.

Dining Room Extensions: Perfect for Entertaining

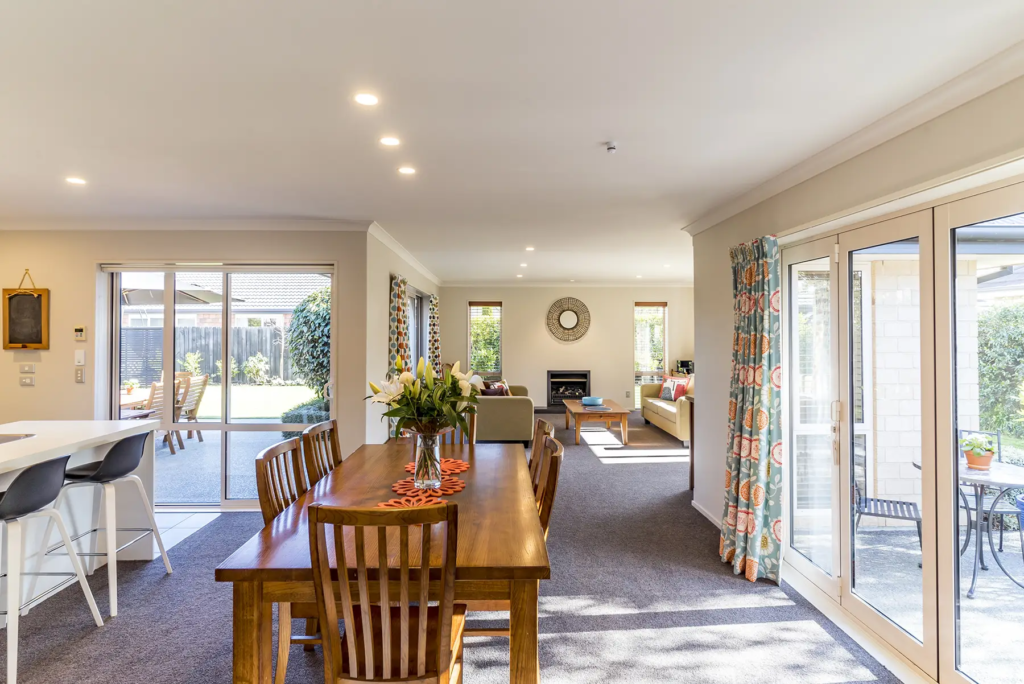
A dining room extension provides a stylish, functional space ideal for family gatherings and entertaining, creating an open-plan living area that flows from the kitchen which boost your home’s appeal and makes it more sellable in the future.

Family Room Extensions: More Space for Growing Families

For growing families, a family/play room extension adds versatile space adaptable to changing needs, such as a playroom or cozy movie area, these spaces usually change from play rooms to home offices as time goes on and kids grow up.
building regulations

Planning Your 3 Meter House Extension

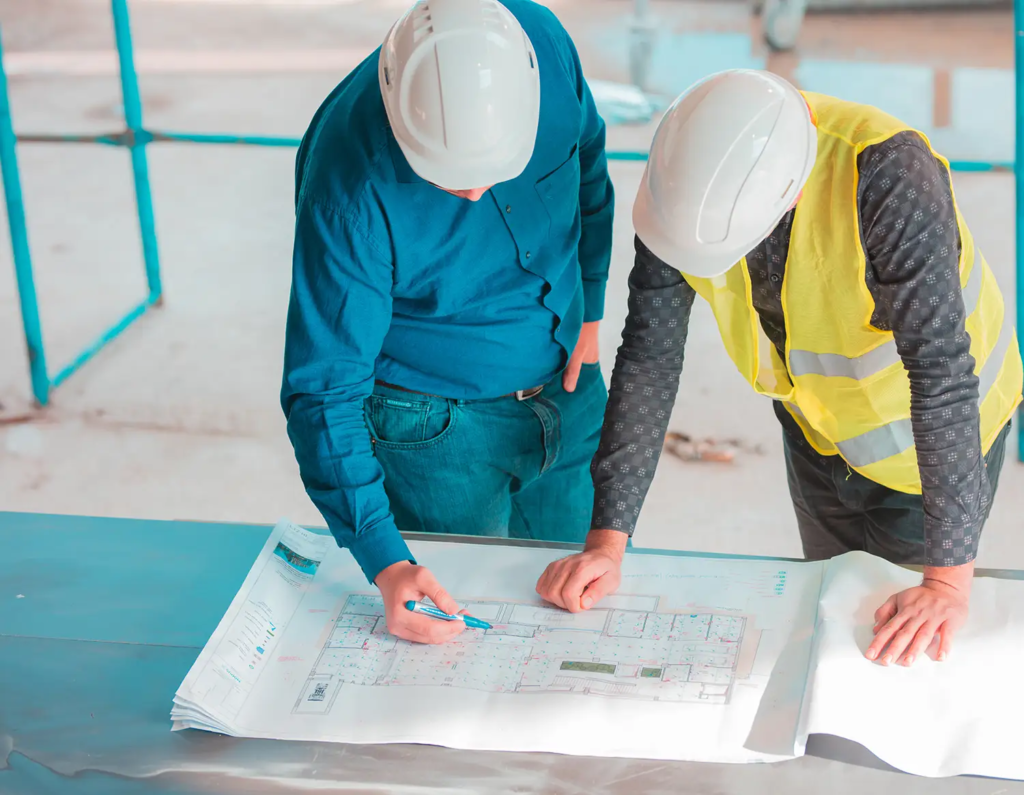
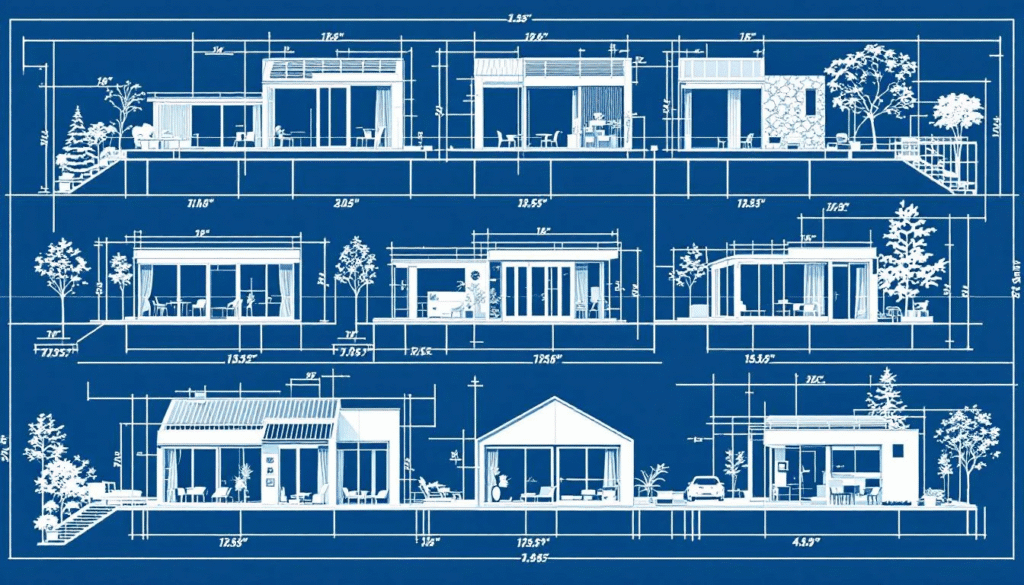
Planning is crucial for any home extension project. Securing permissions, designing the look and feel of your space, and setting a realistic budget are all necessary steps to ensure a smooth and successful project. Careful planning from day one will benefit you in the long run, seek the right planning and professional guidance on design and materials, a professional architect and interior designer will create a detailed plan that meets your needs. In the following sections, we’ll explore the essential aspects of planning your extension, including navigating planning permission and designing your single storey extension.

Navigating Planning Permission and Building Regulations

When planning your extension, understanding planning permission and building regulations is essential. Often, a 3 meter extension falls under permitted development rights, which means you might not need to apply for planning permission. However, if you’re thinking about extending beyond 3 meters or if your home is grade 2 listed and in a conservation area, you’ll need to get full planning permission from your local council.

There are important factors to consider, such as the height of your extension, the materials you use, and how close it is to property boundaries. These all need to comply with both permitted development rules and building regs. Working with an architect with local knowledge will make this process much easier by helping you navigate local regulations and ensuring your project meets all necessary requirements.

Don’t forget, obtaining a completion certificate is key to confirming your extension complies with building regs and is safe and legal. It will be difficult to sell your property without a completion certificate.

Designing Your Extension: Tips and Trends

Designing your new space is an exciting opportunity to create a room that truly suits your lifestyle. To make your new space feel bright and welcoming, think about incorporating large windows, skylights, or turning windows into doors to bring in more natural light.

In our experience with designing extensions, open-plan layouts are a really popular choice because they improve the flow and functionality of your home, connecting your extension seamlessly with your existing living space. If you’re looking for ideas to get your creative juices flowing, consider features like built-in shelving to keep things tidy while maximising your home’s space. By focusing on thoughtful design elements, you’ll not only boost the usability of your extension but also add stylish ideas that make it a beautiful and practical addition to your home, all thanks to clever design and extension design.

building regulations

Budgeting for Your Extension

Budgeting is vital. Include all costs such as materials, labor, permits, unexpected expenses, and a 10% contingency fund for unforeseen costs (sometimes 10% isn’t enough). Factors like size, location, materials, and build complexity affect extension costs, which typically range from £30,000 to £140,000 for single-storey extensions and £1,800 to £3,000 per square meter for side extensions. To save money without compromising quality, consider hiring an architect, reusing fixtures, and buying second-hand items. Choosing low-maintenance materials also helps reduce unexpected costs and keeps your project cost-efficient.


Construction Process for a 3 Meter House Extension

The construction process is the most significant step in your house extension project. Hiring a qualified professional ensures the quality and compliance of the work. While DIY projects can be tempting, they carry risks of substandard work and much higher costs to fix issues.

The typical timeline for completing a 3 meter house extension ranges from 3 to 6 months, depending on the complexity and any unexpected challenges that may arise. You just don’t know what you are going to find when you start digging out foundations! Let’s explore the different construction methods and how to select durable and stylish materials for your extension.

Choosing the Right Construction Method

Common construction methods for a include:

  • Brick-and-block: Traditional appeal and good insulation
  • Timber frames: Quick to build!
  • Pre-cast concrete panels: Modern, speedy construction
  • Modular extensions: Constructed using prefabricated modules
  • Structural insulated panels: SIP panels

If you choose to manage the project yourself, you’ll need to direct on-site work, liaise with an architect, and handle the planning authority, this does take up a lot of time and is difficult if you have a full time job, expect some early mornings and late nights.

Selecting Durable and Stylish Materials

Selecting the right materials for your project is crucial for durability and style. Recommended materials include:

  • Concrete, wood, and metal for their strength and aesthetic appeal.
  • Brick, which offers excellent insulation and blends well with traditional homes.
  • Timber cladding, providing a natural, stylish look.

Composite materials like fibre cement board can be rendered to make them extremely durable, weather-resistant, and low maintenance, making them a practical choice for extensions. We would advise taking the time to learn about material choices, by choosing materials that match you current property, meet specific criteria for durability and aesthetics, you can ensure your extension stands the test of time.

building regulations

Finalising Your Extension

Finishing your 3 meter house extension means ensuring the space is functional and complies with local planning authority regulations. Obtaining a Lawful Development Certificate (LDC) proves your extension was completed legally, helping when selling your home. Compliance with building regs covering ventilation, fire safety, and heating is essential to make your home habitable. The satisfaction of enjoying your new space makes the effort worthwhile. You may also need a new  EPC (energy performance certificate)

Communication, Final Inspections and Completion

Communication with your contractor is key to staying updated on progress and timeline changes. Building a 3 meter house extension usually takes 3 to 6 months. Moving out during construction is advisable if you can. for comfort and less stress, but if not possible, a sealed work area can really help separate the work from daily life and minimise dust! Final sign off inspections confirm your extension meets all standards and must be completed before contractors leave, ensuring the space is safe, functional, and compliant.

building regulations

Conclusion

In conclusion, a house extension is an excellent way to add extra living space and increase the value of your property. From proper planning, budgeting to finalising the project, this guide has covered all the essential aspects of a successful extension project. By following these tips and strategies, you can create a beautiful and spacious extension that enhances your home and lifestyle. Whether you’re adding a kitchen, play room, or family room, a well-planned extension can transform your home and provide long-lasting benefits. Ready to start your extension journey? Get in touch with us if you need an architect and let these insights inspire and guide you to achieve the home of your dreams.

2025-12-01T12:47:12+00:00July 3rd, 2025|Categories: General|

Grade 2 Listed Building Restrictions

Grade 2 Listed Building Restrictions: What You Need to Know

Getting familiar with Grade 2 listed building restrictions is essential for anyone owning, looking to buy or planning to work on listed properties, as these strict regulations protect their historical and architectural significance. This article provides an overview of the legal requirements for alterations, the types of work requiring consent, and the importance of engaging with local authorities and conservation officers before doing anything, not even a quick lick of paint! We also highlight common pitfalls to avoid providing you with a comprehensive guide to navigating the complexities involved in managing and preserving the UK’s Grade 2 listed buildings.


listed building

What is Grade 2 Listed Building Status?

Grade II listed buildings captivate us with their rich historic interest and unique architectural significance. Most of these remarkable structures were built before 1700 and have retained much of their original charm, serving as important links to our past, showcasing notable design and local architectural heritage. Each grade ii building plays a vital role in preserving this legacy.

In England, over 90% of the approximately 400,000 buildings carry the Grade II designation, underscoring how common they are and the shared responsibility we have to protect them. Across the UK, listed buildings fall into three categories: Grade II, Grade II*, and Grade I here are the stats:

  • Grade I is reserved for buildings of exceptional interest, these are the crown jewels, making up just about 2.5% of all listed buildings.
  • Grade II* buildings hold particular importance, standing above the special category. Around 5.8% are in this distinguished group.
  • Grade II is the most widespread listing, covering buildings considered of special architectural interest. This category accounts for roughly 91.7% of all listed properties, making it the one most homeowners are likely to encounter.

Remember that your local planning authorities play a key role in enforcing regulations that protect these treasured historic England properties, ensuring their character and significance endure for generations to come.

building regulations

Legal Requirements for Alterations

Changing a Grade II property requires careful consideration. Written permission from local planning authorities is mandatory for both internal alterations and external modifications to ensure historical integrity is maintained.

Failing to obtain listed building consent can lead to severe consequences, including a criminal offence and hefty fines. Local authorities may even require restoration to the original state if unauthorised changes were made. Obtaining consent can be complex and time-consuming, often necessitating detailed plans and justification.


“£50,000 fine for unauthorised work to listed building in Westgate-on-Sea” Read full story here!


Even repairs using like-for-like materials may still need consent if they affect the building’s historical significance. For example, sensitive repairs to windows often need specific consent because of their impact on the building’s appearance.


building regulations

What Types of Grade II listed Building Work Requires Consent?

Not all work on Grade II buildings can proceed without consent. Major changes, such as constructing porches or conservatories, require listed building consent. Similarly, altering external features, including rendering or painting, requires explicit permission.

  • Demolishing any part of a listed building or load bearing structures within its grounds requires full consent.
  • Internal modifications, like subdividing rooms or removing historic features, are subject to stringent building restrictions.
  • Removing key architectural features often results in denied consent due to potential damage to historical integrity.

Assuming that consent isn’t needed for minor alterations, like painting the exterior can lead to significant fines if the changes affect the building’s character. Even modifying structures within the grounds, like garden walls or outbuildings, typically requires permission to protect the property’s architectural and historical significance.

building regulations

Permitted Repairs and Maintenance

Major alterations require consent, but general maintenance and minor repairs typically do not. Routine inspections and timely repairs are essential for historic building upkeep, preventing issues that could compromise structure and historical value.

Using compatible original materials is crucial for maintaining a listed building’s integrity during repairs, especially when exposing timbers. Old building materials generally don’t react well when matched with modern day materials, incorrect material can harm the building and lead to consent refusal, making professional help advisable for compliance with conservation standards.

Many owners mistakenly assume minor repairs do not need consent, leading to legal issues. Consulting local authorities or a conservation officer will help avoid unauthorised repair work and its consequences. It is wise to seek advice to ensure compliance with regulations, we would not advise moving forward without it!


building regulations

Working with Conservation Officers

Engaging with local conservation officers early can ease the process of obtaining advice and the necessary permissions. They provide invaluable guidance on permissible alterations and help navigate complex regulations, ensuring modifications align with the building’s historical and architectural significance within in the land.

Conservation officers collaborate with local authorities to offer expert advice on historic preservation during planning applications in a conservation area. There main aim is to preserve the unique character of listed buildings while allowing necessary updates and essential repairs, ensuring a smoother, compliant renovation process for owners.


How to Avoid Common Pitfalls of Listed Buildings

Navigating regulation can be fraught with pitfalls. Local planning authorities can issue a listed building enforcement notice for unauthorised work, requiring restoration to the original condition. Listed building restrictions, regulations make seeking professional advice and ensuring compliance with regulations essential to avoid this.

Differing interpretations of strict rules by local conservation officers can lead to misunderstandings and delays. Clear communication and early consultation with relevant authorities are key to avoiding these pitfalls, aligning work with guidelines, and preventing costly mistakes in a speedy process. You must understand that unauthorised works to a listed property can be enforced indefinitely.


building regulations

Conclusion

When we look at the journey through the complexities of managing a Grade II listed building, it’s clear that understanding and adhering to regulations is crucial. From obtaining the necessary consents to working with conservation officers and of course budgeting for financial considerations, things tend to be more expensive when working on older buildings! The responsibility of maintaining a Grade 2 listed building is significant, but so are the rewards. By respecting its heritage and carefully planning any alterations or repairs, owners can enjoy a truly unique and historically significant property. These buildings are a big part of our shared history, and by looking after them, we help keep that legacy alive for future generations to enjoy. If you are working on a listed building in Falmouth, Newquay, Truro or any area of Cornwall and need help with planning and design contact us to discuss your project.

2026-04-09T09:33:21+00:00June 4th, 2025|Categories: General|

Join Our Team


We are hiring!

Lilly Lewarne Architects, Chartered Architects, are looking for a talented technician/technologist to join our team.

The successful candidate would be responsible for managing & coordinating projects, liaising with clients and professional consultants. Experience of Revit and Autocad is essential for this role.

Please apply with a cover letter, CV and portfolio via our form below.


    This site is protected by reCAPTCHA and the Google Privacy Policy and Terms of Service apply.

    Lilly Lewarne Architects
    No. 1 Victoria Wharf,
    Malpas Road,
    Truro,
    TR1 1QH


    2025-06-03T15:44:18+00:00June 3rd, 2025|Categories: General|

    Double storey extension cost guide


    Double Storey Extension Costs: Complete Guide

    Planning a double storey extension in the UK can be both exciting and a bit overwhelming. On average, the cost for a two storey extension ranges from £1,400 to £2,400 per square metre. This comprehensive house extension cost guide dives into the key factors that influence the final price, such as where you live, complex extension designs, and your choice of materials. By reading this blog, you’ll gain insights and a few tips on how to budget effectively, not get ahead of yourself at the start, and navigate the planning permission process. Regardless if you’re looking to create more living space for the kids or boost your property’s kerb appeal and value, this is your go-to resource for double storey extension costs and will help you have a successful extension project.


    double storey extension

    Average Double Storey Extension Cost

    A double storey extension adds new floor space to a home by expanding both the ground floor and the first floor.  Building a double storey extension is expected to cost between £1,400 and £2,400 per square metre. So, for an average size double storey 3 meter extension of 35m2, you’re looking at a total price ranging from £49,000 to £84,000. Of course, this depends on various factors that we will cover in more detail below. So, does that mean a single storey extension costs half as much? Sadly no, while it’s less than a double storey, much of the same work is still required. On average, a single storey extension costs between £1,200 and £2,200 per square metre.

    Regional differences can really impact the overall average house extension cost. For instance, builders in London and the South East of the UK tend to charge much more for house extensions compared to other regions. Building a double storey extension in London is generally pricier due to higher labour costs, materials, and the challenges of working on compact sites.

    These figures are of course just averages, and the actual price can vary based on your project’s specific needs, you may be able to complete the build for a cheaper price and you definitely can spend way more than the top average estimates. However, having a good understanding of these average and estimates before starting will help you budget and avoid any financial surprises along the way.


    building regulations

    Breakdown of Two Storey Extension Costs

    Wondering where all the money goes? You may be surprised to se how quickly it goes at the start of the project so lets find out why! Breaking down the expenses of a double storey extension can help you see where your cash is going to be spent and stop you spending too much at the start of the project. To make things easy these expenses can be divided into three main categories:

    1. Planning and Permissions
    2. Foundation and Structural Work
    3. Fixtures and Finishes (Shell Only vs Fully Fitted)

    Each category contributes differently to the total extension cost, with foundational and structural work typically taking up 50-60% of the budget. These breakdowns will give you a clearer picture of where to allocate your funds and how to prioritise different aspects of the project.

    Planning and Permissions

    Planning permission and gaining regulation approval are both essential steps in the process of building a double storey extension. They ensure compliance with local authorities and safety standards. The initial cost to apply for planning approval is around £200, with the current flat fee for a double storey extension being £206. Some new extensions might not require planning permission under permitted development rights, however, it’s essential to check with your local planning authority to make sure you have the necessary permissions, meet all local regulations, and plan for any extra costs that may arise when building more than one storey. Architects fee’s would also come under this category which can be upwards around 5% of the total construction cost.

    Foundation and Structural Construction Costs

    Foundation and structural work are at the heart of any multi storey extension project. Typically, the average costs for the foundation phase range from £110 – £170 per square metre, when assumed foundation depths are correct. Needing extra depth means extra costs, plus variations in soil type and density will affect the final cost. Building control will assess ground conditions and a structural engineer or architect will recommend foundation designs.

    Once the foundations are set, attention shifts to constructing the external structure, including walls and the roof. While double storey extensions may appear more expensive per unit area, they often prove more economical than single-storey ones due to shared foundation and roofing labour costs, dormer roofs are a great way for homeowners looking to maximise space and return on investment.

    Fixtures and Finishes

    Fixtures and finishes are pivotal in determining how much your going to pay for a two storey extension, offering a prime opportunity for savings. By opting for a shell-only extension, you can reduce initial expenses, as this leaves the interior unfinished, allowing you to complete it at your own pace as your budget allows. This approach is ideal for those who can handle some finishing work themselves, transforming it into a more cost-effective project. Finishing costs will be much more if your addition has extra plumbing and electrics, for example in a kitchen or bathroom extension.

    Basic finishes typically range from £10,000 to £20,000, while a fitted kitchen might set you back £5,000 to £15,000 plus fitting. Custom cabinetry and unique design elements will skyrocket these costs. However, choosing standard fixtures and finishes can help keep the project on a strict budget. Ultimately, a shell-only extension offers the best money-saving potential for hands-on homeowners willing to invest time and effort into their project.


    building regulations

    Additional and Hidden Costs to Consider in Double Storey Extensions

    When planning a double storey extension, although sometimes difficult it’s important to account for hidden and additional fees that can impact your budget. Beyond construction expenses, consider Value Added Tax (VAT) at 20% on materials and labour, make sure your quotes clearly state this cost and get receipts as you may be able to claim some VAT back, planning permission fees in the UK typically charge between £200 and £500, and building control fees ranging from £1,000 to £2,500. Building regulations approval is also necessary to meet safety standards, potentially involving a ‘Full Plans’ application and inspections.

    Tell your home insurance company about the extension to ensure coverage during and after construction. Depending on your location, special assessments like flood risk or noise impact studies might be required, increasing extension costs. Utility upgrades and landscaping changes post-construction will also add to your budget, regardless of any garden upgrades with construction workers and diggers tearing up the ground there will be some making good to do.

    Unexpected bills might arise from additional structural support, material price changes, is it in an area of outstanding natural beauty as this will complicate the process or extra permits may be needed. Issues like soft ground may demand extra foundation work. Being aware of these potentially considerable costs helps you plan finances better and maintain a contingency budget for surprises. Its is not unusually to come across one or more of these issues during the building work, have a back up plan of where you can save money in other areas of the project.


    building regulations

     Types of Double Storey Extensions

    Double storey extensions come in all shapes and sizes, each designed to fit different property layouts and homeowner preferences. One popular option is the double storey rear extension, which extends the back of a property into the garden. A double storey rear extension is ideal for semi-detached, detached, and terraced homes with ample garden space.

    Another common style is the double storey side return extension, which is built along the side of a property, often leaving most of the garden space untouched. This option provides additional living space without drastically changing the existing layout, though it’s important to consider planning restrictions and construction costs. Side extensions or rear extensions work well for detached or semi-detached homes. In particular, semi-detached extensions might require a party wall agreement and careful planning to manage additional fees and shared wall considerations. For more detailed information on these and other house extension types, check out our building an extension blog here.

    What are party wall agreements

    Party wall agreements are crucial for house extensions in properties with shared walls, like semi-detached or terraced houses. They help prevent potential disputes and ensure construction doesn’t damage neighbouring properties. If your double storey extension involves work on a shared wall, you’ll need this agreement, which details responsibilities and protects both properties. Notify neighbours at least two months before starting work, and if there’s disagreement, a surveyor will have to step in and mediate. This agreement is both a legal requirement and a smart way to ensure a smooth construction process.


    building regulations

    Timeline for Completion

    Building a double storey extension is a big project for anyone, and the time it takes can vary. It depends on how complicated the design is, how large the extension will be, and how quickly you can get the materials and workers you need. Generally, you might expect the whole process, from getting planning permission to finishing construction, to take anywhere from 6 to 12 months which is a realistic timeline. It’s a good idea to work closely with your architect, builder, and anyone else involved to set a schedule and keep everyone on the same page about what needs to be done and when. A well-thought-out timeline can help you avoid delays, keep unexpected costs down, and make sure everything goes smoothly. Remember, the average UK cost of a double storey extension is influenced by how long it takes, time is money so planning and budgeting carefully is key to avoiding any surprise expenses.


    Hiring Professionals for Your Double Storey Extension

    Getting the right professionals on board is essential for a successful double storey extension. Architects and structural engineers play vital roles in making sure your house extension is both practical and safe. Architects will create detailed plans, while structural engineers ensure that everything meets building regulations and is structurally sound. Good groundwork is crucial to maintaining the integrity of your extension so don’t try to save too much money there.

    If your project involves working on or near a shared wall in a semi-detached property, you’ll need to secure a party wall agreement. As mentioned above his agreement is an important part of the planning process and can impact both the timeline and budgets.

    It’s wise to check a contractor’s credentials and gather multiple quotes to assess their past work and professionalism before making your decision. Doing so will help you find a reliable team that can deliver quality work within your budget. A helpful tip is to talk to past clients of your chosen contractors to get truly honest feedback.


    building regulations

    Will a Double Storey Extension Add Value to My Home?

    Adding a double storey extension is likely to significantly increase your existing property’s value. By expanding your living space, you enhance the functionality and appeal of your property, which typically leads to a higher market value. Reusing materials from the existing building can save some money and impact planning regulations, especially when dealing with historical or listed structures. Both single and double, extensions generally offer substantial benefits by boosting property value and improving living area and comfort for property owners. In some cases, a well-executed double storey extension can add up to 25% to your property’s value.

    The quality and design of the extension play a crucial role in determining the overall increase in property value, plus the market cap on the area you live in. You can check with local estate agents before construction begins to get an estimated value once work will be completed, estate agents often note that the number of bedrooms and bathrooms in an existing house is a critical factor in assessing a home’s value post-extension. Investing in a double storey extension is not only a practical solution for gaining more space for your family but also a strategic move to boost your existing property’s marketability and value.

    Conclusion and Next Steps

    In conclusion, a double storey extension is a fantastic way to boost both the space and value of your home. It’s crucial to keep an eye on all the costs involved, from construction to planning permission and building regulations. Teaming up with experienced professionals can make the whole process run smoother and ensure everything is up to code. By planning ahead and tackling aspects like party wall agreements, permitted development rules and any additional costs, you can successfully expand your living area and increase your property’s worth. If your experienced in DIY consider strategies to save money, such as managing the project independently, submitting planning applications without expert help, and opting for a shell-only house extension to finish of yourselves. Take these steps to transform your home and reap the rewards of a double storey extension for years to come. Feel free to get in touch with us if you are planning a home extension in Cornwall.

    2026-03-04T12:41:54+00:00May 5th, 2025|Categories: General|

    Minimum depth of foundations Building Regulations UK

    Foundation Requirements Simplified: Minimum Depth of Foundations Building Regulations UK

    Ensuring that your construction project aligns with the UK building regulations is crucial for maintaining the stability and safety of the structure. There is no single foundation depth that suits every UK home. However, Approved Document A states that, except where strip foundations are founded on rock, they should reach at least 450mm to their underside to protect against frost action. This is a starting point rather than a universal answer, as greater depths may be required to reach suitable bearing ground or account for clay soils, trees and the building’s load. In this article, we will break down these requirements and provide practical insights to help you meet the relevant construction standards.


    foundations

    Importance of Accurate Depth

    Getting the foundation depth right is not just about following the rules or numbers quoted online; it is about ensuring the longevity and stability of your project. Accurate depth has a significant impact on structural stability and load transfer, two critical factors that ensure your building stands the test of time.

    Poorly designed bases can lead to serious consequences such as ground subsidence and structural instability. Cracks running through walls or movement within the building can often be avoided by following the correct foundation-depth guidance.

    From our perspective as local architects in Cornwall, understanding and implementing the correct foundation depth is crucial for several reasons. Firstly, it ensures that the design loads are adequately supported, preventing future structural issues that could compromise the building’s integrity.

    As architects, we must consider the unique site conditions, including soil type and nearby structures, to design foundations that support the building while maintaining its architectural vision. Ensuring the correct depth allows our construction plans to retain the aesthetic and functional aspects of the design without sacrificing safety.

    The foundation needs to provide clean and firm support while adequately bearing the design loads. This means it must be deep enough to reach a suitable ground layer that is strong enough to support the weight of the building without shifting or settling.

    Building Regulations Overview

    The Building Regulations provide the framework for ensuring that foundations adequately support the weight of a building, prevent instability and use suitable construction materials. These regulations protect builders and future occupants by setting clear standards for safe construction.

    One key document guiding foundation design is British Standard 8004:2015, which provides technical standards for the design and construction of foundations.

    Local authority requirements, soil conditions and load transfer are critical factors that must be considered in foundation design. Each construction site has its own challenges and requirements, which is why it is essential to carry out a thorough site assessment before breaking ground.

    By understanding and adhering to these requirements, you can ensure that your project meets the relevant legal standards and remains structurally sound for years to come.

    building regulations


    Minimum Depth Requirements

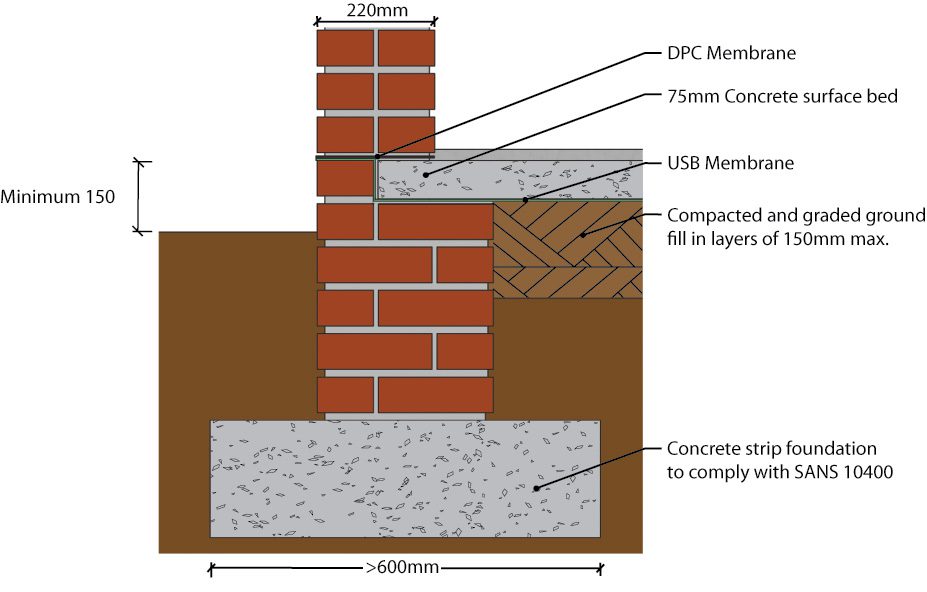
    When it comes to strip foundation depths, there is no one-size-fits-all solution. The required depth and width depend on the ground conditions, building load, nearby vegetation and the depth of suitable bearing ground.

    For most strip foundations not founded on rock, the government guidance gives 450mm to the underside as the frost-related minimum.

    Shrinkable clay requires more specific treatment. Approved Document A gives minimum depths of 750mm for low-shrinkage clay, 900mm for medium-shrinkage clay and 1,000mm for high-shrinkage clay. These depths may still need to increase where trees are nearby or suitable bearing ground lies deeper.

    Depth is only part of the design. Table 10 of Approved Document A shows recommended strip-foundation widths ranging from 250mm to 850mm across the stated combinations of ground condition and wall load. Very soft soils are referred for specialist advice.

    On sloping sites, stepped footings or suspended floors may also be required.

    Single-Storey Extensions

    For a single-storey extension, excavation depth must be selected for the actual ground and load rather than assumed from the number of storeys alone. A trench around 1 metre deep is common on straightforward sites, but it is not a universal rule.

    The 150mm figure sometimes quoted for strip foundations refers to the minimum thickness of the concrete, or the wall projection where this is greater, rather than the total depth of the trench (Approved Document A, paragraph 2E2(c)).

    Foundation excavation depths must align with the specifications outlined in the approved plans. Any deviation from the approved depth could lead to structural issues and problems with building control. It is therefore essential to follow the approved plans and consult the relevant professionals before concrete is poured.

    Two-Storey Buildings

    Two-storey buildings naturally place a greater load on their foundations, but there is no general rule stating that their excavation depth is only 200mm.

    The correct depth and width depend on the calculated wall load, ground conditions, trees and the depth of competent bearing soil. The government’s strip-footing table covers wall loads from 20kN to 70kN per linear metre and gives widths of up to 850mm for some firm-clay conditions (Approved Document A, Table 10).

    This highlights the importance of customising the foundation design rather than relying on storey count alone.

    building regulations


    Factors Influencing Foundation Depth

    Understanding the factors that influence foundation depth is essential for ensuring the structure’s stability and safety. Key considerations include soil type, groundwater levels, building size and local climate.

    Each of these elements plays an important role in determining the appropriate foundation depth for a project. Unfavourable ground conditions, including nearby trees or structures, may require deeper trenches or a different foundation design.

    Single-storey strip foundations can be particularly affected by clay soils, existing trees and nearby foundations. Vegetation can also influence foundation-depth requirements by changing moisture levels within the soil.

    Site-specific surveys consider soil conditions and local requirements to determine the necessary depth. Ultimately, the soil’s load-bearing capacity is a critical factor.

    It is advisable to work with building control, as an inspector will normally check the exposed ground once the trenches have been dug and before concrete is poured.

    Soil Type and Ground Conditions

    Soil testing is important because it influences the required foundation size, type and reinforcement. Different soil types can significantly affect foundation depth and the overall structural integrity of the building.

    Shrinkable soils require sufficient depth to account for their tendency to swell and shrink as moisture levels change. A thorough site assessment, including geological maps and trial pits where appropriate, can help identify the soil type and ground conditions accurately.

    An architect’s design should specify the minimum depth for foundations built on shrinkable soils, ensuring that they reach a suitable bearing stratum.

    Approved Document A classifies shrinkable clay for this purpose as clay with a Modified Plasticity Index of 10% or more (Approved Document A, paragraph 2E4).

    This technical threshold helps explain why a ground investigation is more reliable than judging the soil by its appearance or location alone.

    Climate and Frost-Susceptible Soils

    The local climate and the presence of frost-susceptible soil can influence foundation design, particularly in areas exposed to prolonged cold weather.

    Frost can affect structures through a process known as frost heave. When moisture within the ground freezes, it expands and can exert upward pressure on foundations. This can potentially lead to cracking, movement or structural instability.

    In frost-susceptible soils, foundations need to extend to a sufficient depth to prevent frost action from affecting the structure. Approved Document A gives 450mm to the underside of a strip foundation as the standard frost-related minimum, except where the foundation is built on rock. Greater depth may be necessary in areas subject to longer periods of frost or where suitable bearing ground is deeper.

    Adjacent Structures and Trees

    Trees affect foundation-depth requirements by changing moisture levels in the surrounding soil. This can result in deeper foundations being required, particularly where shrinkable clay is present.

    There is no single distance or foundation depth that applies to every tree. The species, mature height, distance from the building and shrinkage potential of the soil all need to be considered. The clay-soil minimum depths in Approved Document A may need to be increased where trees are nearby.

    When dealing with shrinkable soil, existing or proposed trees and shrubs should be assessed as part of the foundation design. Adjacent structures can also influence foundation requirements because they may alter load distribution and ground conditions.

    Careful consideration of tree proximity and surrounding structures is therefore essential when determining a suitable foundation depth.

    building regulations


    Types of Foundations and Their Depths

    House foundations are primarily divided into two categories: shallow foundations and deep foundations. Each type serves a different purpose and is suitable for different ground conditions and structural requirements.

    Common shallow types include strip and trench-fill foundations, as covered by the NHBC guidelines. The appropriate type and depth are determined by the soil conditions and structural requirements.

    Trench-fill foundations are commonly used where the soil close to the surface has sufficient load-bearing capacity. However, when the ground conditions are poor or the construction load is particularly high, deep foundations may be necessary.

    Shallow Foundations

    Shallow foundations, including strip, pad and trench fill, are used to transfer building loads to soil near the surface. Their dimensions must be based on the building load and the ground encountered.

    Under the simplified plain-concrete guidance, strip foundations can range from 250mm to 850mm wide, while the concrete should be at least 150mm thick or equal to the wall projection where this is greater (Approved Document A).

    These figures describe foundation width and concrete thickness, not a universal excavation depth. Trench-fill foundations are suitable where the ground conditions and design loads allow them.

    Deep Foundations

    Deep foundations are used when shallow foundations are unsuitable due to poor soil conditions or substantial structural loads.

    Common types include piles and drilled shafts, which transfer the building load much deeper into the ground. These may be required where the soil near the surface does not have sufficient load-bearing capacity.

    Ensuring Compliance with Building Regulations

    Working with current building regulations is important for any construction project, especially self-build projects.

    A qualified professional should assess the site conditions when determining the required foundation depth. This helps ensure compliance and protects the building against structural problems and costly repairs. Working directly with a structural engineer may be required where calculations or a bespoke foundation design are needed.

    Building-control inspectors also play an important role by visiting the site and checking the trenches before the next phase of construction.

    Approved technical drawings and specifications should be in place before building begins. If the excavated ground differs from the assumptions made during the design, the foundations may need to be revised before concrete is poured.

    Excavation Practices

    Excavation practices lay the groundwork for a solid and stable foundation. Trenches should be relatively dry, correctly formed and excavated to the dimensions required by the design.

    Following the approved plans for excavation depth is important for avoiding structural problems or non-compliance with building regulations.

    When roots are encountered at the bottom of a trench, it may be necessary to excavate deeper or take special precautions to maintain stability. Site assessments and trial pits can help identify potential obstacles and guide the excavation process.

    Decisions about excavation practices are typically made by the construction manager or site engineer alongside building control, ensuring that the work aligns with the project’s design and safety requirements.

    Reinforcement and Concrete

    The quality of the reinforcement and concrete is key to the foundation’s durability and strength.

    Reinforcement must be correctly sized, positioned and supported to safely transfer loads. This is particularly important where the design has been adapted to accommodate specific ground conditions.

    Choosing the correct concrete mix is equally important. The concrete must be durable and suitable for its intended use to support the foundation’s long-term performance. An architect or structural engineer can work with the concrete supplier to specify the appropriate concrete mix and strength for the project.

    building regulations

    Conclusion

    Adhering to the correct foundation-depth requirements and building regulations is vital for residential construction projects. Properly designed foundations support structural stability, reduce the risk of subsidence and help protect neighbouring buildings.

    Guidance including Approved Document A and British Standard 8004:2015 provides an important framework for foundation design. However, minimum depth requirements still depend on soil type, local conditions, trees and the specific loads created by the proposed building.

    By following the approved design and using suitable excavation, reinforcement and concrete practices, you can create a durable foundation that safely supports the building for years to come.

    2026-09-17T12:24:56+00:00April 2nd, 2025|Categories: General|

    Wraparound extension guide

    Wraparound Extension – Your Guide to Planning and Designing

    Thinking about extending your home? A wraparound extension is a fantastic way to combine a side and rear extension into an L-shape, giving your home that extra space and style boost. In this article, you’ll discover everything you need to know about planning, designing, and building a wraparound extension, from securing planning permission to maximising natural light and creating a seamless connection to your garden. If you dream of a bigger, more functional living area that enhances your home’s aesthetic and value, a wraparound extension could be the perfect solution, lets explore  the process to ensure your project is a success.

    wraparound extension


    What is a Wraparound Extension?

    In simple terms, a wraparound extension is like giving your home a big hug with extra space. By adding both the side and rear extension at the same time, you can create a lovely L-shaped area that opens up your living area. It’s perfect if you want a spacious kitchen, a bright living room, or a family dining area. Plus, it can be tailored to match your home’s style, making everything look seamless and stylish.

    The biggest perk? Loads of extra floor space! These extensions are particularly effective in transforming dead space alongside homes into functional living areas. Unlike just adding to the side or back, a wraparound extension widens and deepens your home. It’s popular in detached houses where space is tight. A well-thought-out design can blend with your home’s architecture, boosting both its looks and value.

    Planning Permission and Permitted Development Rights

    Here’s the deal: wraparound extensions are bigger than your usual side or rear extension usually around 3 meters in size, so you’ll probably need planning permission. Some smaller projects might sneak in under Permitted Development Rights, but the rules are usually tight. Expect to file a planning application and chat with your local planning office to tick all the boxes for your building project. Keep in mind, planning permission can influence the overall cost of your extension, depending on factors like size, structural work, or removing load bearing walls.

    Designing Your Extension

    Think of your new space as an L-shaped box that fits like a glove with your existing space. Turn those awkward spots like side alleys into functional areas. Smart planning can transform your home into an open-plan kitchen-dining-living area, a home office, or even an extra bedroom. Love greenery? Consider adding a balcony or roof garden to your design.

    Designing Your Extension

    Think of your new space as an L-shaped box that fits like a glove with your existing space. Turn those awkward spots like side alleys into functional areas. Smart planning can transform your home into an open-plan kitchen-dining-living area, a home office, or even an extra bedroom. Love greenery? Consider adding a balcony or roof garden to your design.


    building regulations

     Wraparound Extension Ideas and Inspiration

    L-shaped house extensions offer a wealth of design possibilities, allowing homeowners to create a unique and functional living space that meets their needs and enhances their property’s appeal and value. Here are some wraparound extension ideas and inspiration to consider:

    1. Open-plan living: Combine your kitchen, dining, and living areas to create a spacious and sociable open-plan living area that’s perfect for family life and entertaining. This layout not only maximises the use of your floor space but also fosters a more connected and interactive environment.
    2. Bi-folding doors: Install bi-folding doors to create a seamless transition between indoors and outdoors, bringing natural light and fresh air into your home. These doors can open up your living space to the garden, making it feel larger and more integrated with nature. Great for summer BBQ’s!
    3. Skylights and light-wells: Use skylights and light-wells to flood your wraparound extension with natural light, making it feel bright and airy. This is especially useful in areas that might otherwise be a little dark or enclosed, enhancing the overall ambiance of your home. Velux windows are a popular quality choice for skylights.
    4. Utility room: Incorporate a utility room into your new space to provide a practical area for laundry, storage, and other household tasks. This addition can help keep your main living areas clutter-free and organised. Perfect for large families!
    5. Garden connection: Design your wraparound rear extension to connect seamlessly with your garden, creating a harmonious transition between indoors and outdoors. Consider features like large windows, sliding doors, or even a small patio to enhance this connection.
    6. Modern materials: Use modern materials such as glass, steel, and timber to create a sleek and contemporary extension that complements your existing property. These materials can give your home a fresh, updated look while maintaining structural integrity.
    7. Traditional touches: Incorporate traditional touches such as brick, stone, or render to create a wraparound extension that blends seamlessly with your existing property. This approach can help maintain the character and charm of your home while adding some modern comfort.


    building regulations

    Special Considerations

    If your planning a house extension, such as a wraparound extension. You’ll need to consider local planning rules and building codes. These projects often require planning permission, which can be a bit of a process. Plus, think about how your extension might impact your neighbours, especially their garden space or privacy.

    Structural integrity is key. You might need to remove walls or lay new foundations, so working with a professional architect or builder is crucial to ensure everything’s safe and sound.

    Building Regulations and the Party Wall Act

    All extensions, wraparound included, must meet building regulations. Rear extensions, which extend the property space from the back and are ideal for creating open-plan living spaces, also fall under these regulations. This means submitting detailed plans for approval. A structural engineer might be needed to ensure everything’s going to be structurally solid and safe. And if your rear extension involves party walls, especially in terraced or semi-detached homes, you’ll need to follow the Party Wall Act, which means getting the green light from your neighbours.


    building regulations

    Working with Architects and Builders

    Hiring the right pros can make or break your project. Be clear about your goals and find an architect who knows planning rules and building regs inside out. Use tools like the Royal Institute of British Architects’ ‘Find an Architect’ directory to find the right fit, or if you are located in the South West area then get in touch with us! When choosing a builder, get multiple quotes and check references. A Hiring a Builder Checklist can help keep everything on track. Don’t forget, a wraparound extension is a valuable investment opportunity. It offers the perfect chance to incorporate a utility or living room, enhancing your interior space while adding significant value to your property.

    An Architect’s Perspective:

    As chartered architects, we believe a wraparound extension is an exciting opportunity to redefine the flow and functionality of a home. The key to a successful architectural design lies in balancing natural light, circulation, and integration with the existing structure. These home extensions can maximise both rear space and side space, significantly expanding the living area while preserving outdoor space. We feel strategic use of skylights, large glass doors, and open-plan layouts can create a seamless transition between old and new spaces. We always encourage clients to think beyond just adding square footage to consider how the space will be used daily and how it can enhance their lifestyle.

    Wraparound Extension Cost and Budgeting

    Costs will vary, but on average, expect around £1800 to £2,500 + VAT per square metre. Don’t forget to factor in professional fees, planning application fees, and building control fees. While it can be a big investment, a wraparound extension can add serious value to your home, making it a smart long-term move.


    Other Things to Consider When Adding Extra Living Space:

    Conservation Areas and Listed Buildings

    If you’re in a conservation area or have a listed building, expect extra planning hurdles. Work with heritage property specialists to ensure you’re following the rules while preserving your home’s charm. You’ll need a detailed application and consultations with planning authorities to get the green light.

    Timeline and Project Management

    From start to finish, expect your extension to take around 3 to 6 months. It’s wise to allow up to a year for any hiccups, delays in planning or design changes. A reliable builder will outline timelines and payment schedules to keep things moving smoothly.


    building regulations


    Building a Wraparound Extension Process: What to Expect

    Building a wraparound extension can be a complex and time-consuming process, but with the right guidance and expertise, it can also be a rewarding and exciting project. Here’s what to expect when building a L-shaped home extension:

    1. Planning permission: Determine whether you need planning permission for your extension and submit an application to your local planning authority if necessary. This step is crucial to ensure your project complies with local regulations and avoids any legal issues.
    2. Design and planning: Work with an architect or designer to create a detailed design and plan for your wraparound extension, taking into account factors such as budget, space, and functionality. A well-thought-out design will ensure that your new floor space integrates seamlessly with your existing home.
    3. Party wall agreements: If your wraparound extension affects neighbouring properties, obtain party wall agreements to ensure that all parties are aware of and agree to the project. This is particularly important in semi-detached homes where shared boundary walls are common.
    4. Building regulations: Ensure that your project complies with building regulations, including structural integrity, fire safety, and accessibility. This may involve submitting detailed plans for approval and working with a structural engineer.
    5. Construction: Work with a reputable builder or contractor to construct your wraparound extension, using high-quality materials and techniques to ensure a durable and long-lasting finish. Regular communication with your builder will help keep the project on track and address any issues promptly.
    6. Project management: If your brave enough to be overseeing your own project, you will need to manage your project carefully, ensuring that all aspects of the build are completed on time, within budget, and to the required standard. This includes coordinating with various professionals, scheduling inspections, and keeping detailed records of progress.
    7. Completion: Once your project is complete, inspect the work carefully to ensure that it meets your expectations and make any necessary adjustments before finalising the project. This final step ensures that your new extension is ready for use and meets all your needs.

    By understanding the process of building a wraparound extension and exploring different design ideas and inspiration, you can create a beautiful and functional living space that enhances your property’s value and meets your needs.

    Maximising Your Investment

    For the best bang for your buck, plan carefully and design thoughtfully. A seamless blend of indoor and outdoor spaces can elevate your living experience and add value to your home. Check in your street if anyone has completed a similar project to compare the before and after property values. High-quality materials and finishes can make your house extension feel luxurious and desirable but will eat away at any profits. Consider the potential return on investment (ROI). A well-designed wraparound extension can boost your property’s market value, offering a solid ROI over time. Focus on functionality and aesthetics to ensure it meets your needs now and in the future.

    Overcoming Common Challenges

    Planning permission delays, party wall disputes, and unexpected construction issues can pop up. Having experienced professionals on your side can help manage these challenges. Be ready for delays and have a backup plan to handle any bumps in the road.


    Final Considerations

    A well-planned wraparound extension can significantly enhance a home’s space, functionality, and value. By carefully considering design, regulations, and budget, homeowners can ensure a smooth and successful project. With the right team and thorough planning, a wraparound extension that uses up dead space on your property can transform a house into a dream home. Planning an extension? Get in touch with us for help or find out how much building regulations drawings cost here.

    2025-12-01T12:43:46+00:00April 2nd, 2025|Categories: General|

    Inside a dormer loft conversion

    Inside a dormer loft conversion – from loft to living space

    Standing in your loft, surrounded by years of accumulated memories, you might see nothing more than a dusty storage space. But what if this forgotten area could transform into the most amazing room in your home? With this article we take a look inside dormer loft conversions to discover why these popular house extensions are more than just renovations – they can completely transform your homes living space, we cover if dormers fall under permitted development rights or if you need full planning permission along with some dormer loft conversion ideas.

    ceiling height

    The Art of the Dormer – What are dormer loft conversions?

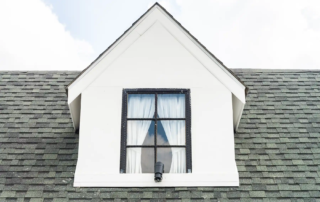
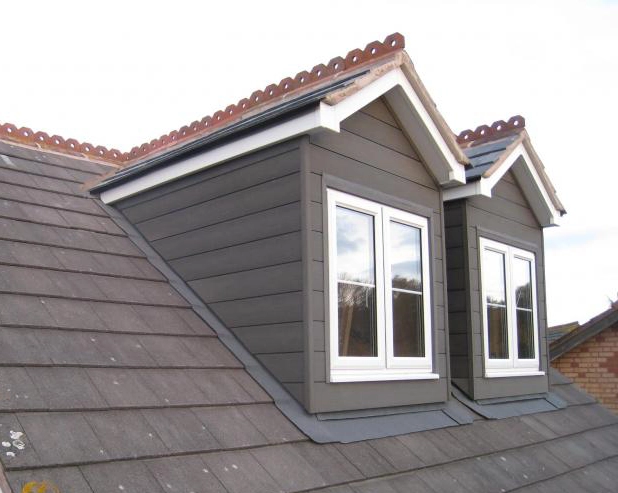
    Roof dormers are a popular choice of loft conversion in the UK, by converting unused attics they provide valuable extra space while enhancing your home’s functionality and value. Imagine a transformation that goes beyond just adding square footage. A dormer is an box shaped structure that extends out from your existing roof structure, often designed with a flat or pitched roof, creating vertical walls and dormer windows that offer more natural light to redefine your home’s potential. It’s not merely an addition, it’s a revitalisation of often the most overlooked part of your house.

    The variety of dormers is truly remarkable. Some draw inspiration from classic architecture, like the gable-fronted dormer, reminiscent of a traditional doghouse with its charming silhouette. Others adopt modern styles with flat-roof designs, making good use of internal loft space and creating sleek, contemporary lines.


    building regulations

    FAQ’s

    What can you use a dormer loft conversion for?

    Converting unused roof space into dormer can be a great way to increase the size of your home, they can be used for various purposes, such as an additional guest bedroom, a home office, a man cave, a playroom, or even a private retreat for anti social teenagers.

    Do you need planning permission for a dormer conversion?

    In many cases, rear dormers fall under UK permitted development rights, meaning no planning permission is required. However, if you are within a conservation area, have front-facing roof windows that may over look neighbours or have plans for a large conversions, this will usually need formal approval as larger conversions usually need the expertise of a structural engineer. It’s always best to check with your local planning authority.

    What are the different types of dormer loft conversions?

    There are several options to choose from depending on your current roof pitch and home construction, including gable-fronted loft dormers, pitched roof or flat-roof dormers, hip-to-gable loft conversion dormer, and Mansard, each offering unique benefits in terms of space and aesthetics. We will go into more detail on the different types below!

    What is the average cost of a dormer conversion?

    The cost of adding a dormer into your loft space varies depending on factors such as size, location, and specifications. On average, in the UK a dormer loft conversion costs can range between £30,000 and £60,000.

    Can you have an ensuite bathroom in a dormer loft conversion?

    Yes, it’s possible to include an ensuite in a dormer, provided there is adequate space and access to plumbing. An ensuite can add convenience and value to your home.

    Can you put a dormer on a semi-detached house?

    Yes, you can enjoy more usable floor space by adding a dormer to a semi-detached or terraced house, and there are several options available depending on your property’s structure and local planning regulations. It’s essential to check planning permissions and building regulations before proceeding. Find out how much building regulations drawings cost here.

    Do dormers have enough headroom?

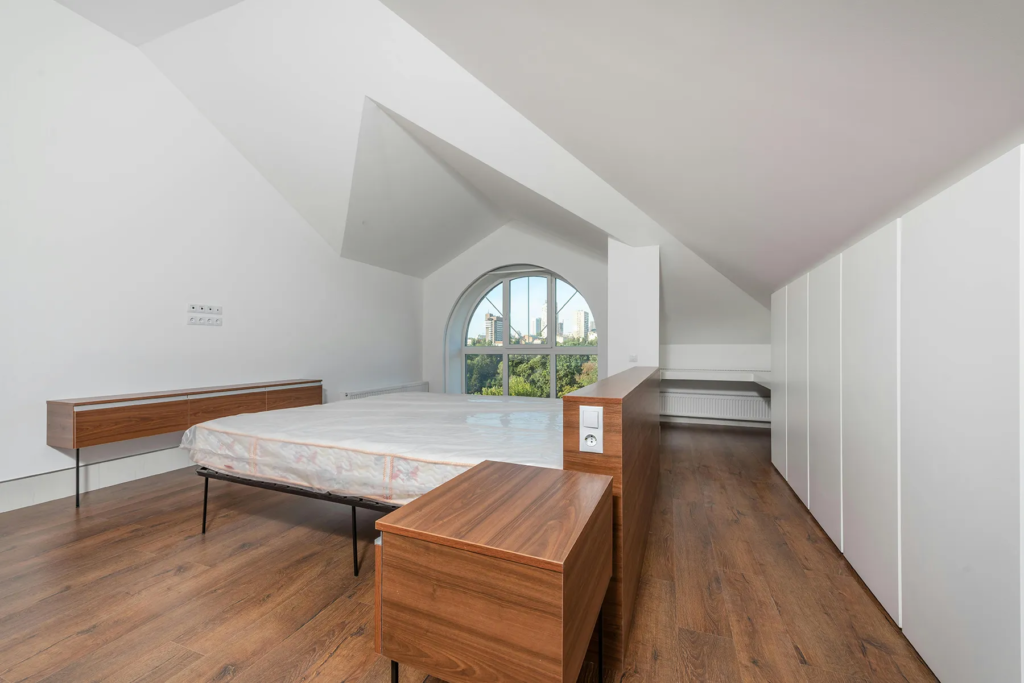
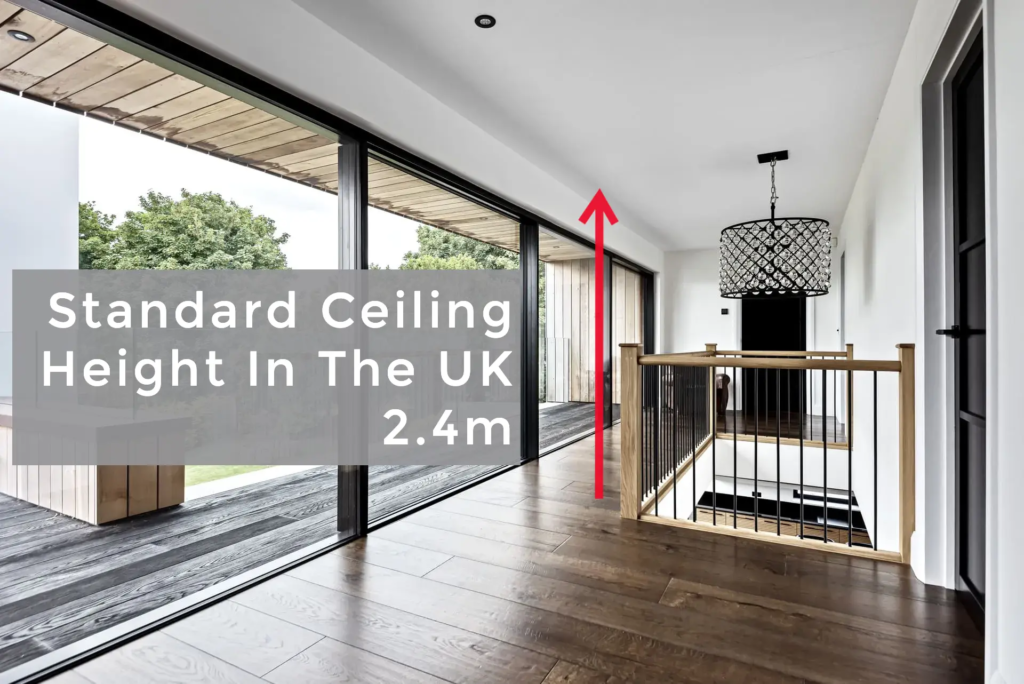
    Headroom is a key consideration when planning the inside of a dormer loft conversion. This will vary depending on roof construction for example flat roof dormers may have less headroom than a pitched roof design. According to UK building regulations, a loft conversion should have a minimum ceiling height of 2.2 meters from floor to the highest point of the existing roof. Find out about the standard ceiling height in the UK here. It’s important to ensure compliance with building regulations for head height in living areas and your new loft stairs to create a comfortable and legally approved fully functional living area.


    building regulations

    Types of Dormer Loft Conversions

    Different types of dormers offer varying benefits depending on your home’s architecture and your specific needs:

    Mansard Dormer
    Named after French architect François Mansart, this dormer is usually constructed at the rear of a property. It features a central flat roof with vertical walls that slope at a 70-degree angle, creating a significant increase in space.

    Gable-Fronted (Doghouse) Dormer
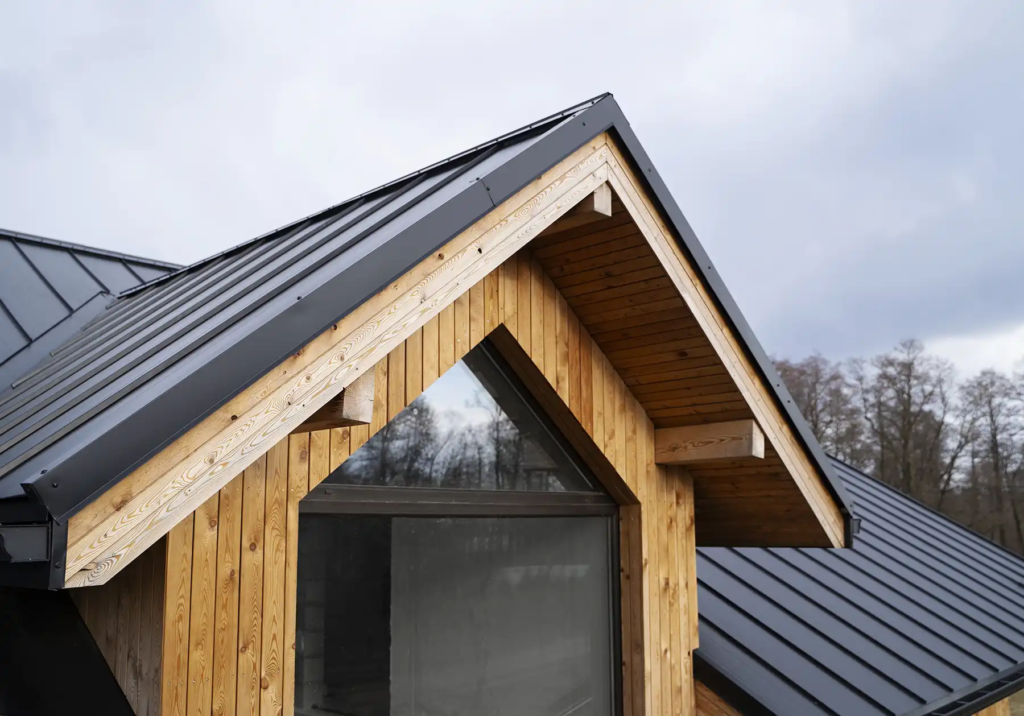
    Featuring a pitched roof with two sloping sides, this dormer creates a triangular shape below the roofline. It adds aesthetic charm and can be built as a small decorative feature or a larger space-enhancing the loft extension.

    Hip Roof Dormer
    Similar to a gable-fronted dormer but with three sloping sides instead of two, this style provides more horizontal space than a gable dormer while provide greater headroom than a shed dormer.

    L-Shaped Dormer
    An L-shaped dormer involves constructing two dormers—one over the main house and another over a rear extension. The two structures meet to form an L-shape, commonly used in Victorian terraced properties to offer more space.

    Shed Dormer
    This type features a single sloping roof that extends in the same direction as the main roof but at a shallower angle. It lacks peaks or hips, reducing construction costs while still boosting interior space.

    Flat Roof Dormer
    A box-like structure with a flat roof, typically built at the rear of a property. It provides the most internal space and headroom, as all walls are vertical, though it may appear bulky compared to other styles.


    building regulations

    The Cost and Return on Investment

    Adding a loft conversion to you existing house is a significant financial commitment, but the potential return makes it a smart investment for many homeowners. As mentioned above on average, a dormer conversion in the UK costs between £30,000 and £60,000, depending on many factors such as size, location, and specifications. High-end conversions with custom finishes and en-suites can easily exceed this price range.

    However, as with many building projects if planned correctly the return on investment (ROI) can be substantial. A well-executed loft conversion can increase your home’s value by up to 20%, making it one of the most cost-effective home improvement projects available. In area where housing demand is high, the extra living space can significantly boost market appeal, attracting buyers looking for additional bedrooms or functional workspaces.

    Beyond financial gain, the value of a dormer loft conversion extends to lifestyle improvements and when properly insulated a loft conversion will improve your homes energy efficiency by retaining heat usually lost through the roof. More usable space means greater comfort, increased storage options, and the ability to adapt your home to your evolving needs, this could be accommodating a growing family or creating a serene home office. While the upfront cost may seem daunting, the long-term benefits both financially and practically make a dormer loft conversion a worthwhile consideration for most homeowners looking to increase the size of their homes.


    building regulations

    Dormer Loft Conversion Ideas

    A dormer loft conversion isn’t just a way to maximise space, it’s about unlocking the potential inside of your home in creative and functional ways. Here are some inspiring ideas to make the most of your new loft space:

    A Luxurious Master Suite
    Transform your attic into a spacious master bedroom with an ensuite, walk-in wardrobe, and stunning skylights.

    A Stylish Home Office
    Create a quiet, light-filled workspace that enhances productivity and offers a peaceful retreat from the rest of the house.

    A Cozy Guest Room
    Give visitors a warm and inviting space, complete with a dormer window nook for added charm.

    A Vibrant Playroom
    Turn your loft into a fun and colourful play area for children, complete with built-in storage and plenty of natural light.

    A Relaxing Lounge or Media Room
    Design a dedicated entertainment space with comfortable seating, a projector, and soundproofing for a cinema-like experience.

    A Creative Studio
    No matter if it’s an art studio, a music room, or a yoga retreat, a dormer conversion can provide the perfect private space for hobbies and creativity.

    By tailoring your dormer loft conversion to your specific needs, you can create a functional and inspiring space that enhances both your home and lifestyle.


    building regulations

    Conclusion

    Every home has a story waiting to be told, and sometimes that story begins by looking up. A dormer loft conversion is an invitation to see your home differently, to recognise that potential exists in the most unexpected places. It’s about creating space that is not just functional, but transformative for your family. Every dormer loft conversion project begins with a simple act of imagination. What could that dusty attic become? A creative studio? A quiet sanctuary? An additional bedroom that solves your crowded space challenges? The possibilities are as unique as your home, as limitless as your imagination. Get in touch with us if you need help navigating building regulations approval, planning permission or architectural design for your dormer conversion.

    2025-03-05T12:36:23+00:00March 5th, 2025|Categories: General|

    Estimating building regulations drawings cost

    Estimating Your Building Regulations Drawings Cost

    Budgeting for building regulations drawings cost is essential for any construction project. Typically, these fees range from £695 to £10,000, influenced by many factors like project complexity, size, and location. This article will help you understand these costs in more detail, the areas that affect them, provide ways to estimate your expenses accurately and ways to save some money.

    ceiling height

    Understanding When You Need Building Regulations Drawings

    Building regulations drawings provide detailed plans to ensure compliance with national construction safety and efficiency standards. They are crucial for meeting health and safety requirements in your building project.

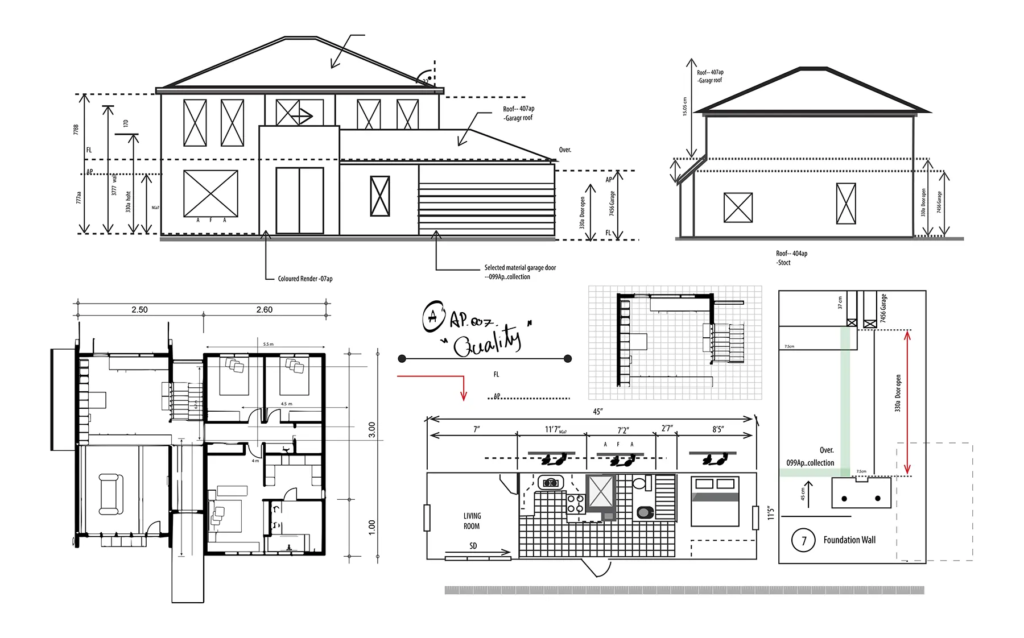
    Whether you are building, renovating, extending, or converting a property, compliance with building regs are mandatory. Building reg drawings are detailed technical plans with some packages including all supporting construction documents such as insulation requirements, structural calculations, beam calculations and technical drawings.

    Building regulation drawings and planning permission are completed at different stages, planning permission would be obtained first to look at if the development fits in with local building control policies, once planning has been granted you then move onto building regs drawings or a building notice depending on your project.

    When Can You Use a Building Notice?

    A Building Notice is a method of obtaining building regulations approval without the need for detailed technical drawings to be submitted, reviewed, or approved beforehand. Instead, approval is granted through notifying building control and conducting regular site inspections. This approach is suitable only for straightforward, minor projects such as removing internal walls or constructing a small porch, provided that you or your builder are fully aware of the required standards. You can not use a building notice if the project involves complex structural work, affects a public sewer or if disabled access needs detailed plans, you would need full building regs drawings for any of these.

    building regulations

    Building Regulations Drawings costs

    Budgeting for building regs drawings is crucial when starting a construction project. These costs can vary significantly, typically ranging from £695 to £10,000. Several factors influence these fees, including the amount of site inspections, design complexity and size of the project. It’s also worth noting that the cost of full building regulations applications can range from £1,200 to £4,000 or more, depending on the local council.

    The type of construction project you’re undertaking will significantly impact the cost of building regs drawings. For instance, the price estimates for a single storey extension differ from those for a double storey extension or a wrap-around extension. Each type of project requires different levels of detail in the drawings, which affects the overall price. For example, a single storey extension might be simpler and less costly compared to a loft extension and it will be much easier and cheaper than a new build double storey house.

    When considering a loft conversion, the technical drawings will need to include specific details about structural support and insulation, which can increase fees. Similarly, new build projects, whether a bungalow or a double storey house, require comprehensive technical drawings to ensure compliance with all building regulations.

    These detailed planning drawings are crucial for obtaining building control approval and ensuring the safety and efficiency of your construction project. This table has some ballpark figures outlining the costs of full plans and inspections for different types of construction projects, its essential to check with your local planning authority.


    Project type Full plans Cost £ Inspection Cost £
    Single-storey extension £240-£600 £320-£410
    Double-storey extension £250-£650 £330-£450
    Loft conversion £260-£680 £280-£450
    New build £1000-£6500 £500-£1200


    Factors Influencing Building Regulations Drawings cost

    Several factors influence the price of building regs drawings, making it essential to understand what drives these expenses. Awareness of these factors aids in accurate anticipation and effective budgeting. Let’s look into these factors in more detail.

    Project Complexity

    Project complexity significantly affects the price of building regulations drawings. Intricate designs demand more documentation and regulatory compliance, raising fees. For instance, elaborate architectural features or unique structural elements necessitate specialised knowledge from architects and structural engineers, leading to higher fees. Increased project complexity necessitates detailed planning and thorough inspections at key construction stages, ensuring compliance and smooth issuance of completion certificates. Understanding your project’s complexity offers a clearer idea of associated fees, aiding in more effective budgeting.

    Size of the Project

    Project size also influences the price of building regulations drawings. Larger projects typically incur higher fees due to the need for more detailed plans and complex building regulations. Extensive projects, such as multi-storey buildings or large extensions, require numerous technical planning drawings and revisions. The scale of the project directly correlates with the number of required drawings and site inspections by building control officers. Larger projects often involve multiple stages, each needing detailed documentation and approval.

    Location and Local Authority Fees

    Geographical location and local fees greatly affect building regulations drawings final price. Fee structures for building regulations approvals vary widely across local authorities. For example, local councils in England apply different rates, impacting the overall fees of your project, which is subject to local authority building control.


    How to Save on Building control fees

    Several methods can help save on building regulations drawings. One effective approach is utilising Competent Person Schemes, government-authorised programs allowing qualified tradesmen to self-certify compliance with building regulations. Registering with a Competent Person Scheme allows homeowners to avoid building control fees, as the work is signed off by the same person, reducing local planning authority involvement. Handling processes online and avoiding site visits further reduces costs. These measures save money and streamline the process, enhancing efficiency and saving time.


    structural warranty

    Conclusion

    Accurately estimating the cost of building regulations drawings is essential for the success of any construction project, its also important for to know your self build costs if you are building your own home. By understanding what these drawings entail, the factors influencing their costs, and the types of applications available, you can budget more effectively and avoid unexpected expenses. Its important to obtain accurate quotes, plan for contingencies, and explore money-saving measures to ensure your project runs smoothly and complies with all necessary regulations, remember you wont get a completion certificate until all of the construction work complies with building regulations. Get in touch with us if you need help planning your next construction project.

    2026-01-13T10:00:08+00:00February 17th, 2025|Categories: General|

    10 year structural warranty cost UK

    10 year structural warranty cost UK

    If you’re planning a new construction or self build project in the UK, you’ve likely heard about structural warranties. The average cost of a 10-year structural warranty is around £2,000, but this figure can vary significantly depending on multiple factors so it may not be that useful to you. This article will explain in more detail, what can affect the final policy price, warranty providers small print and if you even need a building warranty to secure a mortgage. Whether you’re a self-builder, developer, or homeowner this article will help clear up the confusion surrounding structural defects and self build warranty cover.


    ceiling height

    What is a Structural Warranty and Who Needs One?

    A structural warranty is a type of insurance policy that covers building defects in design, workmanship, and materials in new builds or major renovations. It makes sure the building has been constructed in line with current building regulations along side your local authority building control checks, find out the costs involved in building regulations here. Unlike standard home insurance, which typically covers unexpected damages, a structural or self build warranty provides long-term protection against faults in the building’s structure. This is an important certificate that is often overlooked, but it should be factored into your build cost budget. These warranties are crucial for homeowners, self-builders, developers, and property investors, especially those looking to secure financing or sell a newly built property.


    Factors That Affect the Cost of a Structural Warranty

    Warranty providers will consider several factors when quoting a self-build warranty policy. The price of your policy depends on various factors, and here are the top five that most lenders will focus on before approving a loan:

    • Location – Properties in high-risk areas (e.g., flood zones or regions with subsidence issues) will likely have higher premiums.

    • Contractor Experience – If your builder has a strong track record and accreditation, it may reduce the price.
    • Self-Builders – If you’re taking on a self build project yourself, insurers may see this as a higher risk, leading to increased quotes.
    • Design Complexity – Unique or complex architectural designs can increase the price of a building warranty due to higher perceived risks.
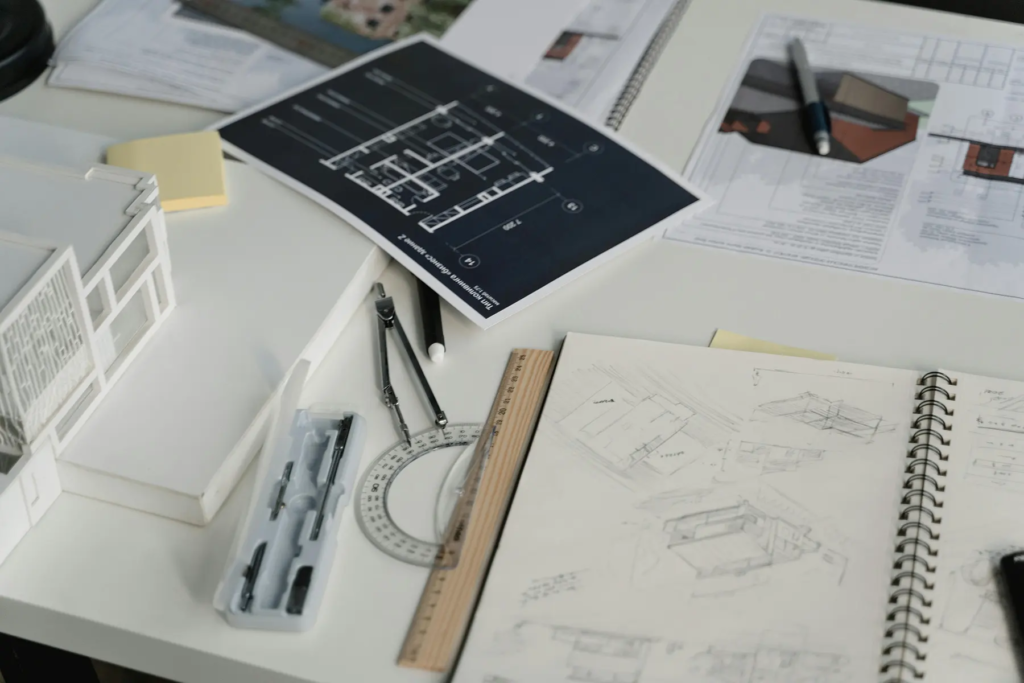
    • Construction Phase – Early applications often attract lower fees compared to seeking coverage during the construction process and certainly after construction has been completed. As well as building control checks, most warranty providers will need an on site technical audit to be completed at certain stages to obtain the certificate, a 10 year structural certificate will help you secure finance.


    eco-friendly home rainwater gutters

    How Much Does a Structural Warranty Cost?

    The typical cost of a structural warranty is around £2,000, which includes the full 10-year coverage along with all necessary technical audits, which are site visits conducted by a professional surveyor, however in reality the actual cost can range from £1,500 to £5,000 and more for retrospective certificates, with self build structural warranties costing slightly more than a large accredited building company. Here’s a general estimate based on property value:

    • Properties up to £250,000: £1,500 – £2,500
    • Properties between £250,000 – £500,000: £2,500 – £4,000
    • High-value properties (£1M+): £5,000+


    The Small Print – Limits of Cover and Policy Excess

    Not all structural building warranties offer the same level of protection. When choosing a policy, consider:

    • Coverage Limits – Policies typically cover defects for up to 10 years, but they may impose a maximum payout limit usually around £1,000,000. It’s crucial to check this limit to ensure it aligns with your project’s value and potential repair costs.
    • Policy Excess – Some policies require you to pay an excess on claims, which varies between warranty providers. This is usually around £1,000 per claim, but some insurers may charge higher or lower amounts based on the policy type. Reviewing the excess terms ensures you’re not caught off guard by unexpected costs if you have to make a claim on your building warranty.

    What’s Excluded?

    As with most insurance policies, warranties do not cover everything! It is vital to choose a suitable structural warranty that covers your specific property needs. Common exclusions include:

    • Wear and Tear – Gradual deterioration of materials and finishes over time is not covered.
    • Weather Damage – Issues arising from storms, floods, or other natural events are usually the responsibility of standard home insurance policies, make sure you have both policies in place.
    • Non-Structural Issues – Problems with fixtures, fittings, or cosmetic defects such as cracked plaster or minor settlement are generally excluded.
    • Workmanship and Maintenance Issues – If defects arise due to poor maintenance or work carried out by an unapproved contractor, they may not be covered under the policy.
    • Ground Movement Not Caused by Faulty Work – Some policies may exclude claims related to subsidence or heave unless they result from construction defects, such as inadequate foundations.


    eco-friendly home rainwater gutters

    Why Doesn’t Normal House Insurance Cover Structural Issues?

    Most standard home insurance policies do not cover structural defects because they are considered pre-existing or due to poor construction rather than unexpected damage. Property insurance typically covers sudden incidents like storms, fire, or burglary, whereas a building warranty is designed to protect against issues resulting from structural failure, defective design or poor construction.

    Do You Need a structural building Warranty to Secure a Mortgage?

    Yes, in most cases. Many mortgage lenders require a structural building warranty or a architects certificate (PCC) before they will approve a loan for a new build or significant renovation. Find out the differences between a structural warranty and a professional consultants certificate here. Without a warranty, securing financing or selling the property could be challenging, especially for self builders as potential buyers may struggle to obtain a mortgage.


    structural warranty

    What happens if you don’t have a self build warranty

    Without a self build structural warranty, you are fully responsible for the cost of repairing construction defects, which will be expensive and difficult to finance. Selling the property may also be challenging, as many buyers and mortgage lenders require a warranty for new builds or major renovations. In some cases, you may need to pursue legal action against the builder, which can be costly and time-consuming. Unaddressed defects can worsen over time, reducing property value to nothing and posing safety risks. A warranty provides essential protection and peace of mind, preventing unexpected financial burdens.


    Conclusion

    In conclusion, a 10-year building warranty is a crucial investment for anyone undertaking a new build or major renovation. While the average cost is around £2,000, various factors can influence the final price. Understanding the limitations and importance of selecting the right self-build warranty cover ensures you make an informed decision. By securing the appropriate protection, you can safeguard your project against potential latent defects or structural issues and enjoy long-term peace of mind.

    2025-07-03T11:39:28+00:00February 17th, 2025|Categories: General|

    Standard ceiling height UK

    The Standard Ceiling Height UK and Why It Matters

    In the UK, the standard ceiling height for most modern homes is approximately 2.4 metres (8 feet). This is a common construction dimension rather than a universal legal minimum. It balances construction costs, energy efficiency and a comfortable sense of space, and also aligns with common 2.4-metre sheet material sizes.

    For new homes in England, the clearest official planning benchmark is different. The Nationally Described Space Standard requires a minimum floor-to-ceiling height of 2.3 metres over at least 75% of the Gross Internal Area. This is a planning standard that applies where a local authority has adopted it, not a blanket Building Regulations minimum for every home.

    London uses a higher benchmark for new housing. The Mayor of London’s Housing Design Standards London Plan Guidance requires a minimum ceiling height of 2.5 metres over at least 75% of the Gross Internal Area. This is 200 mm higher than the national planning benchmark. It is London-specific planning guidance, not new UK-wide legislation.

    These standard heights differ in older and regional properties, where ceilings may reach 3 metres (10 feet) or more, reflecting historical architectural trends. Understanding the distinction between common practice, planning standards and Building Regulations helps homeowners, designers and builders make informed decisions about renovations and new construction.

    This article covers ceiling heights in UK homes, headroom above stairs, loft conversions and the differences between residential and commercial buildings.

    ceiling height

    Building Regulations in Minimum Ceiling Heights

    There is no general Building Regulations rule that sets one minimum ceiling height for every habitable room in an English home. Figures quoted online often refer to a particular planning standard, staircase requirement or design recommendation rather than a universal legal minimum.

    For new dwellings, the Nationally Described Space Standard provides the most useful official reference. It states that at least 75% of the Gross Internal Area should have a floor-to-ceiling height of at least 2.3 metres.

    The government publication also makes clear that the standard sits within the planning system and has no wider statutory meaning outside compliance with that standard.

    Bathrooms, utility rooms and hallways may have lower ceilings because they are occupied for shorter periods, but their design still needs to be safe, practical and appropriate for the building. Local planning policies can also differ, so the relevant local authority requirements should be checked at an early stage.


    Minimum Ceiling Heights Above Stairs

    Headroom above a staircase is a separate Building Regulations issue. Approved Document K gives a minimum clear headroom of 2 metres (6 feet 6 inches) over stairs and landings.

    This figure applies to the staircase, not to the ceiling height throughout a habitable room.

    Approved Document K also recognises the restrictions that can arise in loft conversions. Where the full 2 metres cannot be achieved, its guidance shows at least 1.9 metres at the centreline of the stair and 1.8 metres at the side.

    Designers and architects must also consider sloping ceilings, beams and bulkheads that may encroach on this space. Failure to provide adequate headroom can create safety issues and make Building Regulations approval more difficult.

    Find more information about the cost of Building Regulations drawings.

    eco-friendly home rainwater gutters

    How Ceiling Height Affects Design and Space Perception

    Ceiling height significantly affects the perception of space and interior design. Higher ceilings create an open, airy feel, making smaller rooms appear larger and more luxurious. They also provide flexibility for statement lighting, decorative moulding or mezzanine levels in larger spaces.

    Conversely, lower ceilings can make spaces feel cosy but may feel cramped if they are not designed thoughtfully, particularly in loft conversions. Light colours, vertical patterns and carefully positioned lighting can reduce this effect and help the space feel more inviting.


    Loft Conversion Heights: What You Need to Know

    Loft conversions are a practical way to add usable accommodation and may increase a property’s value, but adequate height is essential for comfort and buildability.

    A ridge height of around 2.2 metres before work begins is commonly used as an initial feasibility guide because insulation, floor structure and finishes reduce the completed headroom. However, 2.2 metres is not a universal Building Regulations minimum for the finished loft room.

    Sloping ceilings also affect how the floor area of a new dwelling is measured. Under the Nationally Described Space Standard:

    • An area with less than 1.5 metres of headroom is not counted within the Gross Internal Area unless it is used solely for storage.
    • Eaves storage with between 0.9 and 1.5 metres of headroom counts at 50% of its floor area.
    • Storage below 0.9 metres does not count at all.

    These are measurement rules within the national planning standard rather than a ban on low eaves in every existing property. They are still useful because they show why the usable width of a loft matters as much as its maximum ridge height. Lower areas can often be used creatively for storage or seating.

    If the available height is limited, potential options include lowering the ceiling of the room below or raising the roof, subject to structural design and any required planning permission. Both approaches can add cost and complexity, so early measurements and professional advice are important.

    eco-friendly home rainwater gutters

    Our Approach to Ceiling Height

    At Lilly Lewarne Architects, we believe ceiling height is more than a measurement. It is a fundamental part of a home’s design and functionality.

    Our approach focuses on creating spaces tailored to your lifestyle and aesthetic preferences while meeting the relevant planning and Building Regulations requirements. From working around existing ceiling joists to developing a new design with more generous proportions, we approach each project with creativity and attention to detail.

    Get in touch to discuss your project.

    For renovations and new builds, we carefully assess how ceiling height interacts with natural light, ventilation and floor-area proportions to produce an appropriate design for the building and its setting.


    Why Would You Raise Ceiling Heights Higher?

    Raising ceiling heights above common minimum benchmarks is a popular choice for those seeking a sense of grandeur or more natural light.

    Taller ceilings create opportunities for larger windows, which can bring more daylight into a room and reduce the need for artificial lighting. They also allow for exposed beams, feature walls, statement lighting and hanging plants.

    Higher ceilings can be particularly effective in smaller homes or apartments because the added volume makes the property feel more open. However, raising the ceiling above 2.4 metres may increase construction costs and the volume of air that needs to be heated or cooled.

    The design should therefore balance appearance, comfort and energy performance.

    smart technology

    Ceiling Heights For Residential and Commercial Spaces

    Residential ceiling heights are commonly around 2.4 metres (8 feet). Commercial spaces often use taller ceilings, commonly around 3 to 3.6 metres (10 to 12 feet), to accommodate building services, equipment, ventilation and different operational needs.

    Retail and industrial buildings may use greater heights depending on their function.

    For workplaces, the official guidance focuses on usable volume rather than one standard ceiling height. The Health and Safety Executive’s Workplace health, safety and welfare guidance L24 says that most workplaces should provide at least 11 cubic metres of space per person.

    Ceiling height above 3 metres is disregarded in the calculation. In the HSE’s example, a room with a 2.4-metre ceiling needs approximately 4.6 square metres of floor area per person to provide 11 cubic metres.

    The HSE also warns that 11 cubic metres may be insufficient where furniture or equipment occupies much of the room. Commercial design therefore needs to consider the room’s use, layout, occupancy, ventilation and building services rather than relying on ceiling height alone.


    Conclusion

    A ceiling height of around 2.4 metres remains common in modern UK homes, but it should not be confused with a universal legal minimum.

    For qualifying new homes in England, the national planning benchmark is 2.3 metres over at least 75% of the Gross Internal Area, while London uses 2.5 metres over the same proportion. Separate requirements and guidance apply to stairs, lofts and workplaces.

    At Lilly Lewarne, we can guide you through the design, planning and Building Regulations stages so your new home or renovation has comfortable proportions and meets the requirements relevant to the project.


    Frequently Asked Questions

    Is 2.4 metres the legal minimum ceiling height in the UK?

    No. It is a common construction height, but there is no single universal Building Regulations minimum for every habitable room in England. The applicable figure depends on the type of project and the relevant planning or Building Regulations guidance.

    What is the official ceiling height standard for new homes in England?

    Where the Nationally Described Space Standard applies, at least 75% of the Gross Internal Area should have a floor-to-ceiling height of at least 2.3 metres. The standard applies through local planning policy rather than as a blanket Building Regulations rule.

    What headroom is required above stairs?

    Approved Document K gives 2 metres as the normal minimum clear headroom over stairs and landings. A constrained loft conversion may use 1.9 metres at the centreline and 1.8 metres at the side where 2 metres cannot be achieved.

    Is 2.2 metres required for a loft conversion?

    No. Around 2.2 metres before construction is a common feasibility guide because the new floor, insulation and finishes reduce the completed height. It is not a universal minimum ceiling-height requirement for the finished loft room.

    Do commercial buildings have a standard ceiling height?

    There is no single height for all commercial buildings. HSE guidance instead uses a general benchmark of 11 cubic metres of space per person in most workplaces, with ceiling height above 3 metres excluded from the calculation.

    2026-09-16T13:46:00+00:00January 26th, 2025|Categories: General|